This past weekend, I took my first leap into home automation! I had wanted to be able to control my bedroom lights without the switch, so after evaluating smart bulbs, dimming switches, and alternate light controllers, I decided to install the Shelly Dimmer 2. The Shelly Dimmer allows me to keep the switches, bulbs, and panel the same, while only making a wiring change behind the panel. I'm also not particularly interested in alternate colors or physical dimming, so this is the perfect option for me.
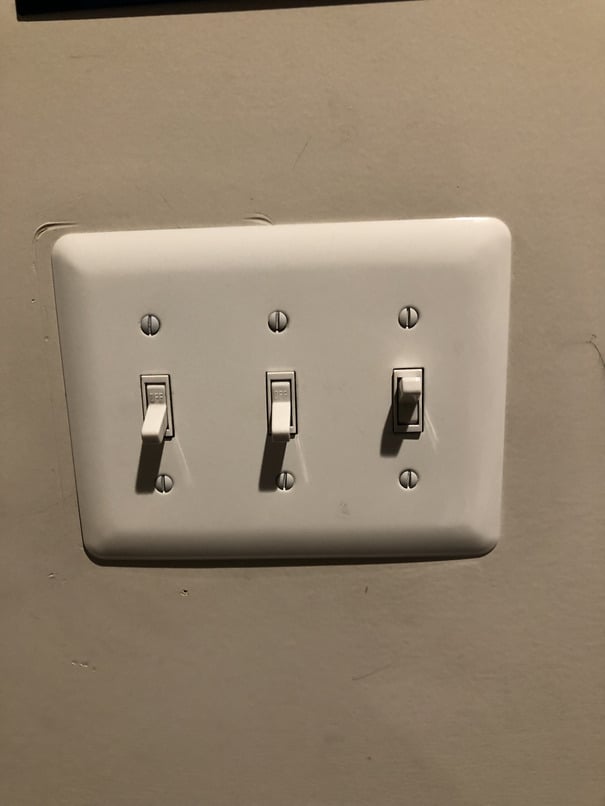
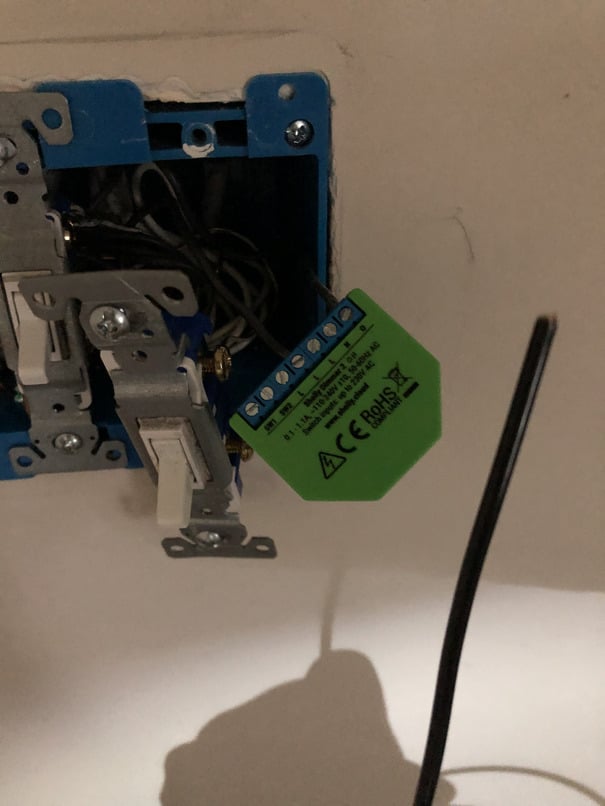
This is what the switch panel looks like in my bedroom. The light switch is a 1301 7w Single Pole Single Throw switch. This means there is only one switch (pole) that controls one light (throw). In other words, a basic on-off switch.
Note: I knew next to nothing about electrical wiring prior to this, aside from a faint memory of how AC circuits worked from my university physics class. Fortunately, I have a friend who clarififed my understanding throughout this process. Thanks Gank!
I didn't realize I needed so many additional components apart from the Shelly. For instance, at the least, I needed
However, for safety reasons, I also bought
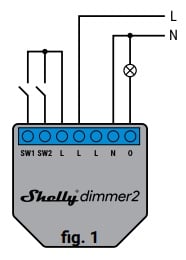
The Shelly guide presents different installation methods, but the setup for "standard power grid with neutral" is the one I suspected would suit my home's wiring, but I intended to clarify.
The other thing to clarify was which wire coming from the switch was the Line (power) or the Load (light). So with the gloves on, I unscrewed the panel.
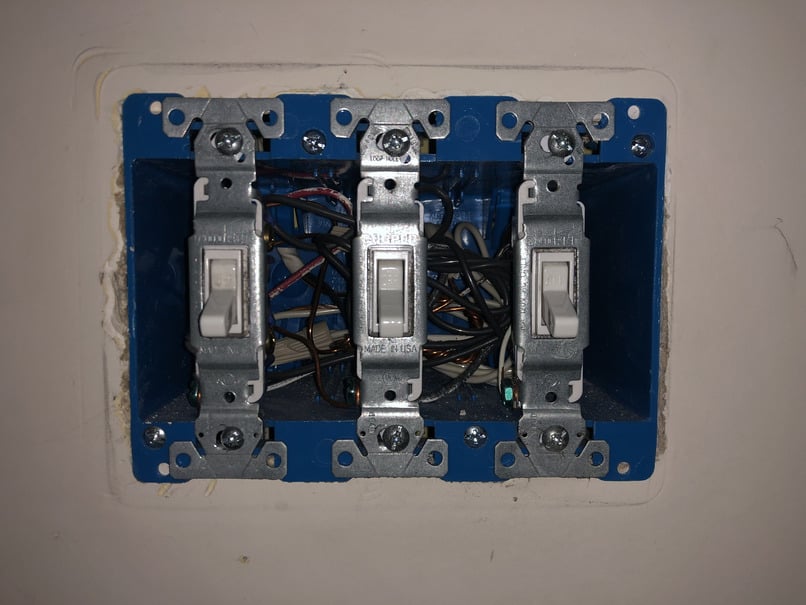
I observed that on the left side, the switch has a white wire connected to ground, and on the right side it has two black wires. Using a wire tester, I determined that the top wire was the Load, and the bottom wire was the Line. Thanks to the advice of the online wiring videos, I turned off power to my room from by basement's circuit breaker. The next step was to find a wire nut that would hold the neutral wires. A little fidgeting allowed me to pull it out. Good to confirm that I can proceed with the standard installation.
First, I disconnected the Load (top) wire from the switch, and connected it to the O (output) hole on the dimmer.

Second, I disconnected the Line (bottom) wire from switch, and connected it to the middle L (Line) hole on the dimmer.
Third, I connected a new black wire from the Load (top) screw on the switch to SW1 hole on the dimmer.
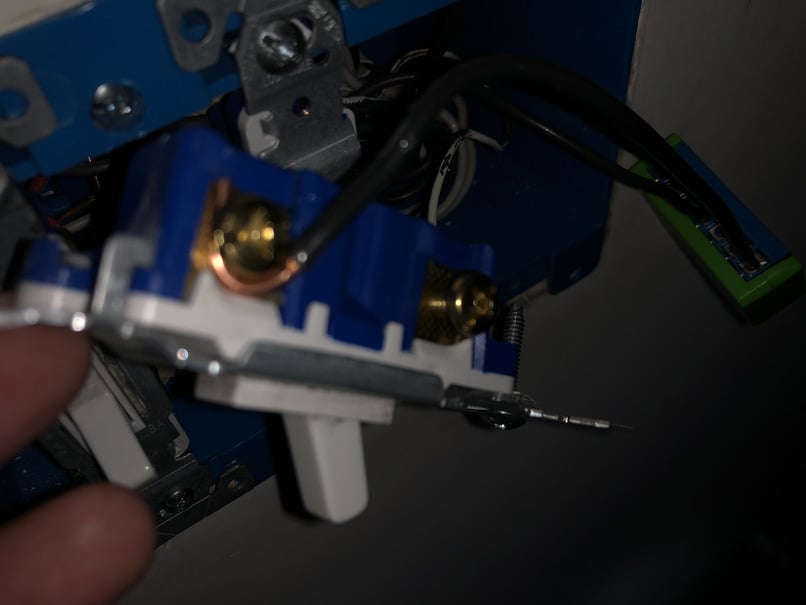
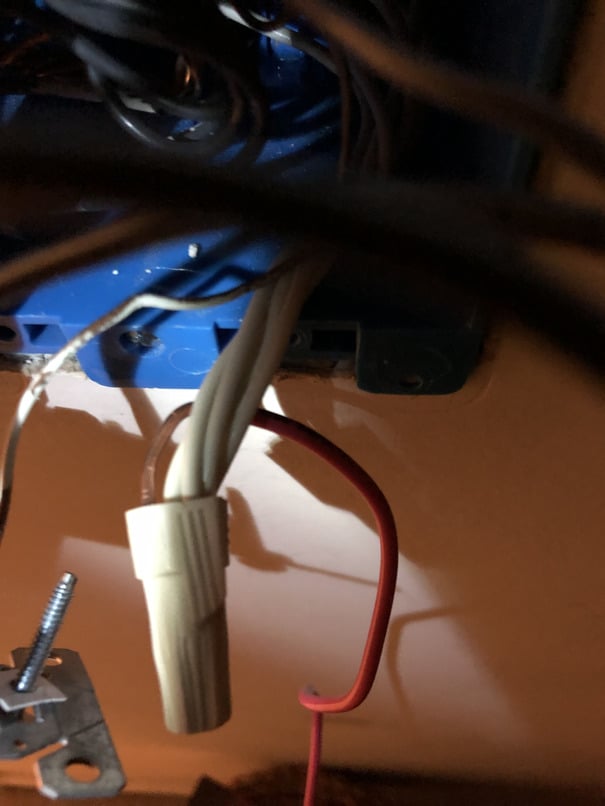
Fourth, I connected a new black wire from the Line (bottom) screw on the switch to the L (Line) hole on the dimmer. And finally, I connected a new pink wire from the N (Neutral) hole on the dimmer to the nut containing the neutral wires. I unscrewed the wire nut and overlayed (and slightly twisted) the pink wire over the others. Then I screwed the nut back on.
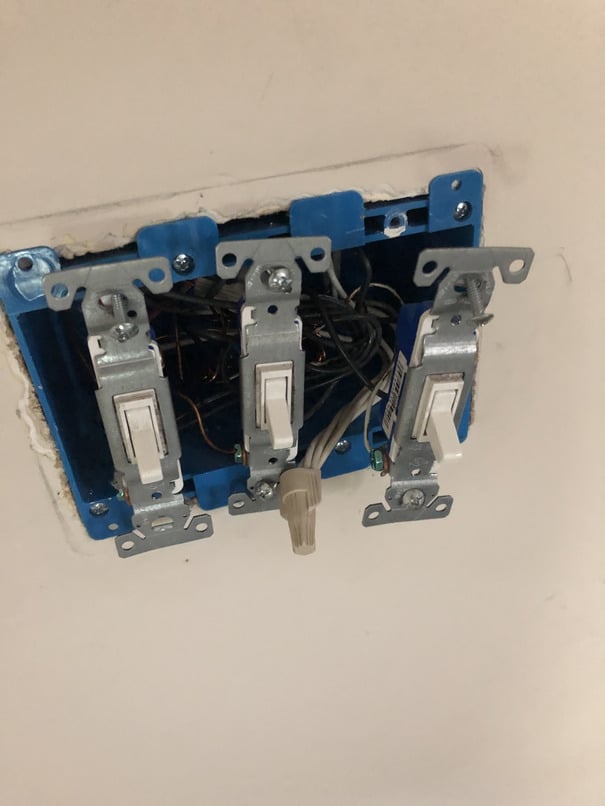
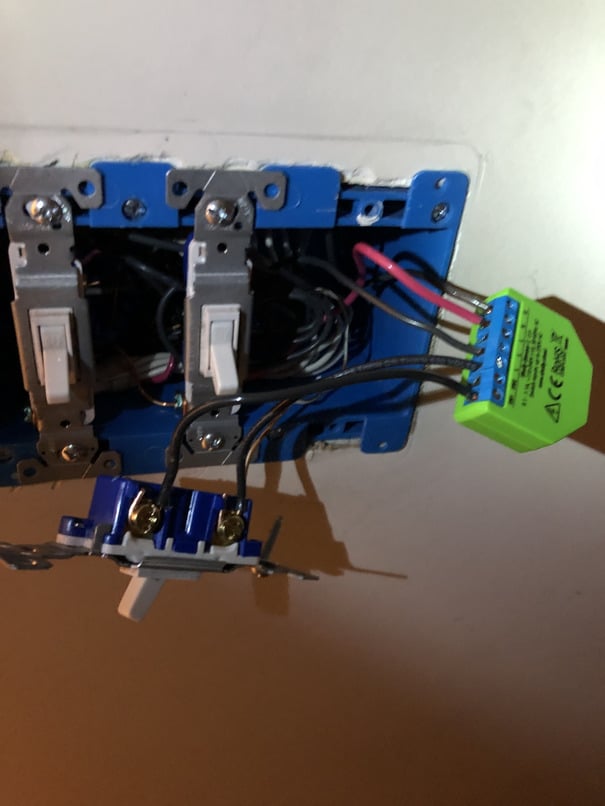
After completing the installation, it looked like this.
I turned the power back on from the basement, flicked the switch on, and observed the lights transitioning into brightness. I then proceeded to get the Shelly connected to the home wifi, before turning my room's power back off to screw the panel back on.
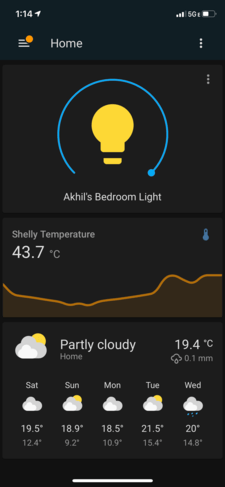
Initially, my toggle switch only triggered a change when it went from its "Off" position to its "On" position. The Shelly web interface allowed me to change the button type to "Edge", to allow both positions of the switch to trigger a state change. However, using the Shelly interface reconfirmed by belief that Home Assistant was the right way to go. I installed it on my Raspberry Pi NAS running NixOS, and linked it to the dimmer. My configuration can be found here: https://github.com/smasher164/nas/blob/bc8a5780ee6354fa732a0c406a924f14135f43a7/configuration.nix#L90. Even better, exposing Home Assistant over Tailscale's VPN lets me remotely control my bedroom lights!
Although I was nervous at first, this built my confidence to try my hand at more home automation. Next up is the garage!